The Final Dining Room Reveal | ORC Week 6

The Final Dining Room Reveal | ORC Week 6

We’re DONE! We’re DONE! We did it! We’re DONE!

Here I sit, in my $20 throne chair, writing this reveal post. Someone please bring me a soft boiled egg on one of my beautiful new egg cups!!

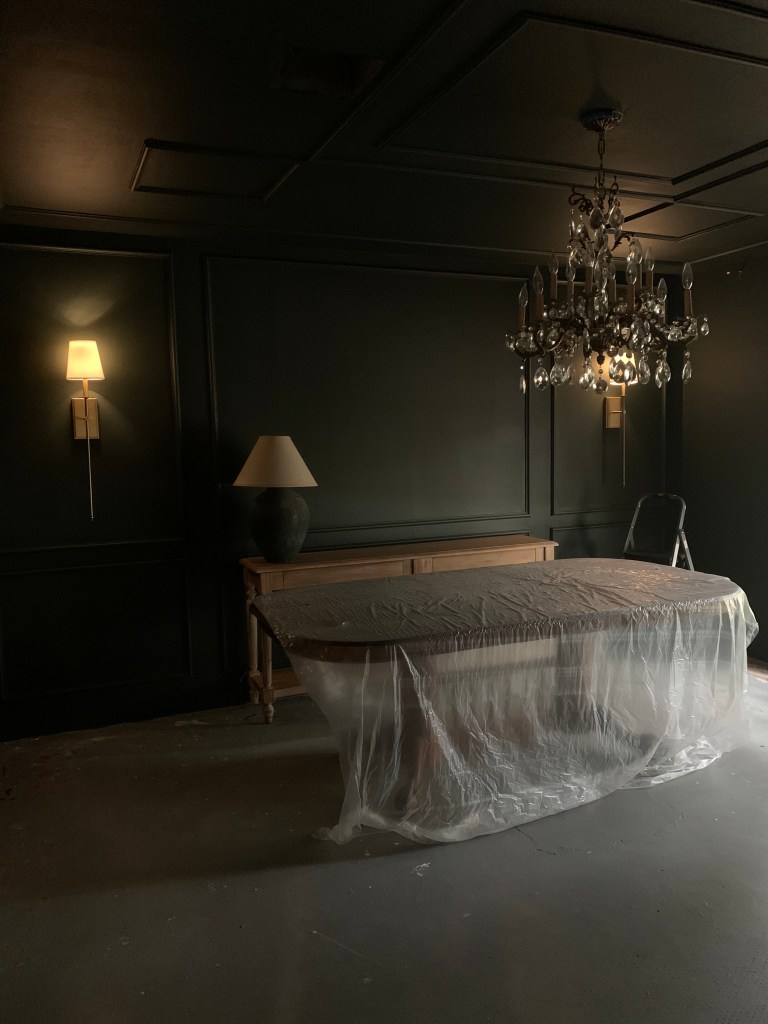
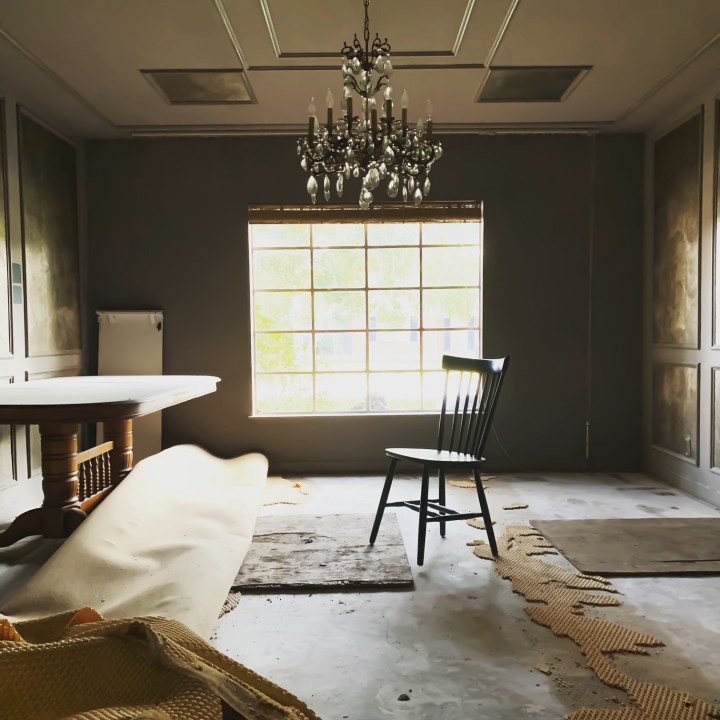
If you’ve been following along on our renovation journey, (thank you for being here!) you know we have come a long way in just over six weeks. When we started this one room challenge our house was torn apart and had holes all through the slab for the foundation and plumbing repairs being made to our home & we’re so glad to have her patched up and feeling much better!

If you missed our previous weeks posts you can catch up here:

Week 1 | Week 2 | Week 3 | Week 4

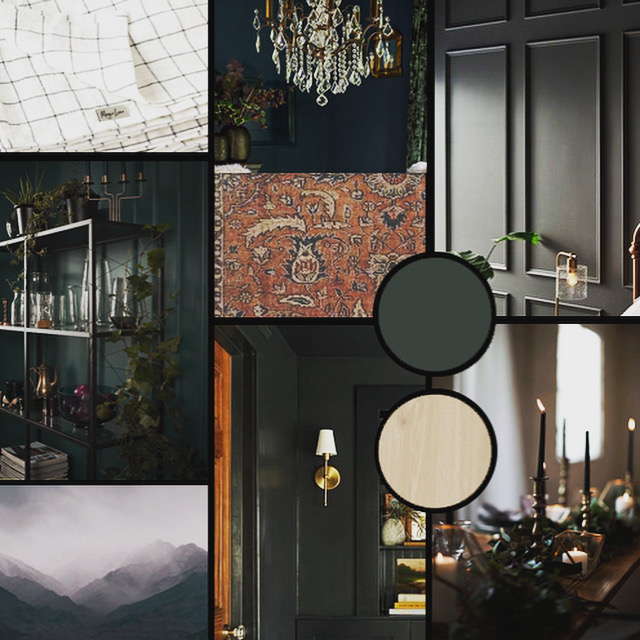
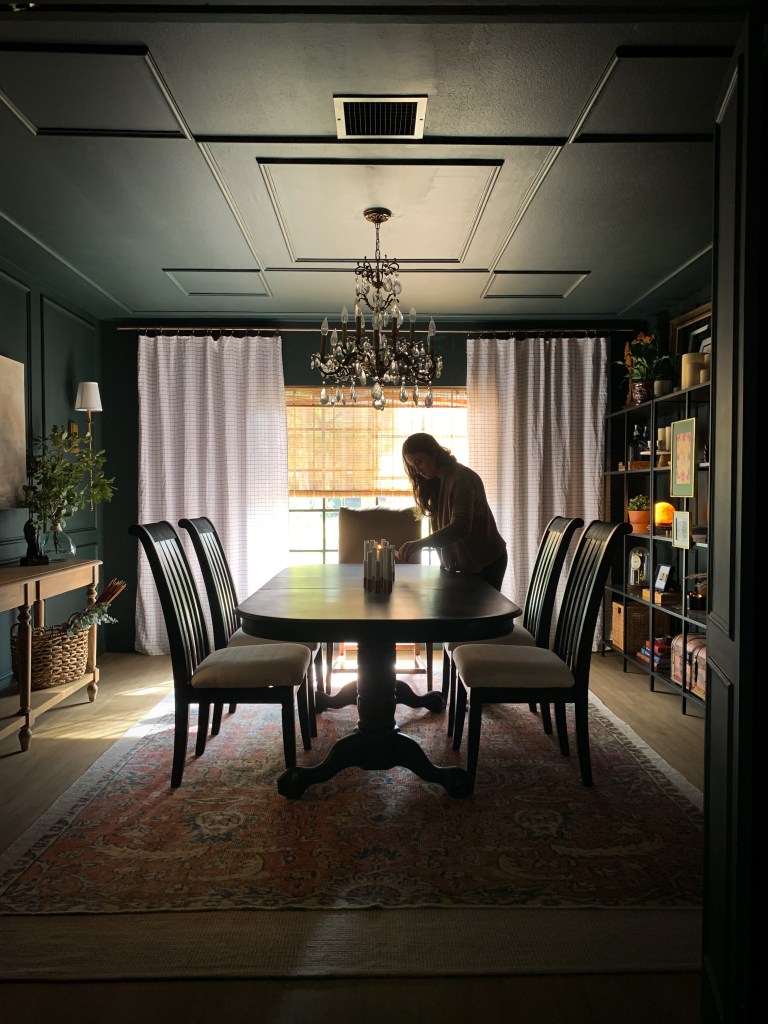
Looking back at the mood board & concept imagery I put together in the beginning of the challenge, the goal was to create a highly emotive space, that was soulful, relaxing, and felt like home. And not to brag, but I think we really nailed it!

Wall Sconce | Console Table | Lamp Shade | Top Rug | Bottom Rug
*Links are Affiliate Links which I may earn commission from*

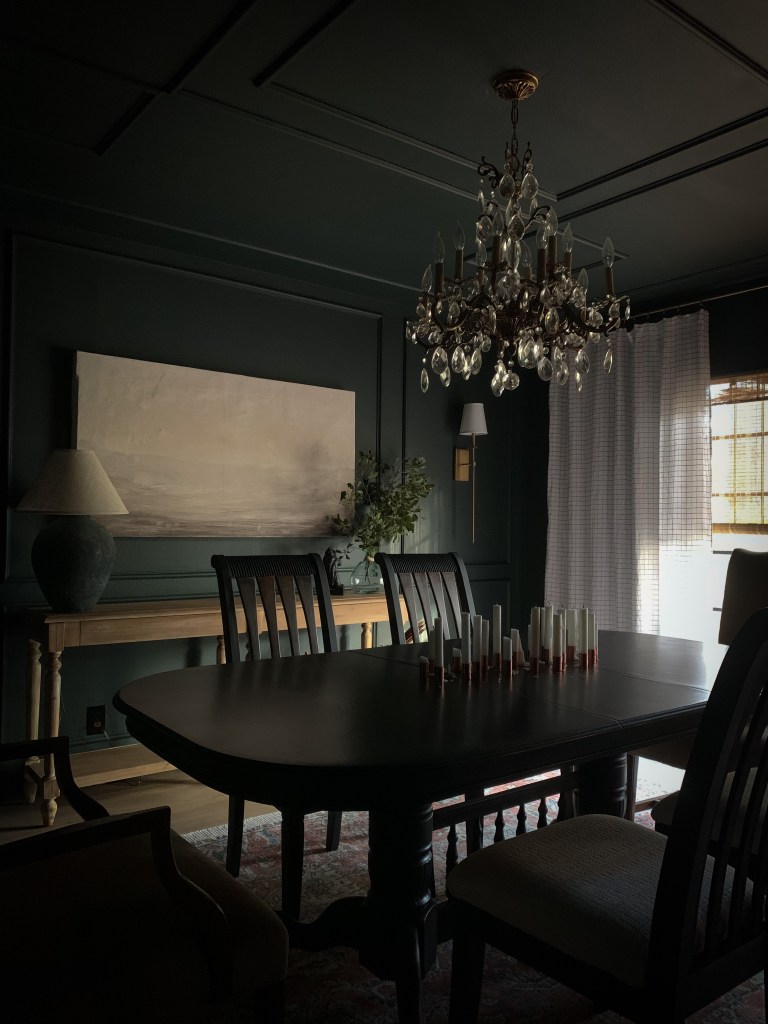
The green paint color we used [Jasper by Sherwin Williams HGTV home] has a subtle sophistication and depth that really makes the beautiful features that this room already had absolutely stunning! The chandelier was already here when we bought the house, as was the molding on the walls and unique molding on the ceiling.

Sconces | Console Table | Glass Vase | Bamboo Shades |Curtain Track | Curtain Ring | Curtains
*Links are Affiliate Links which I may earn commission from*

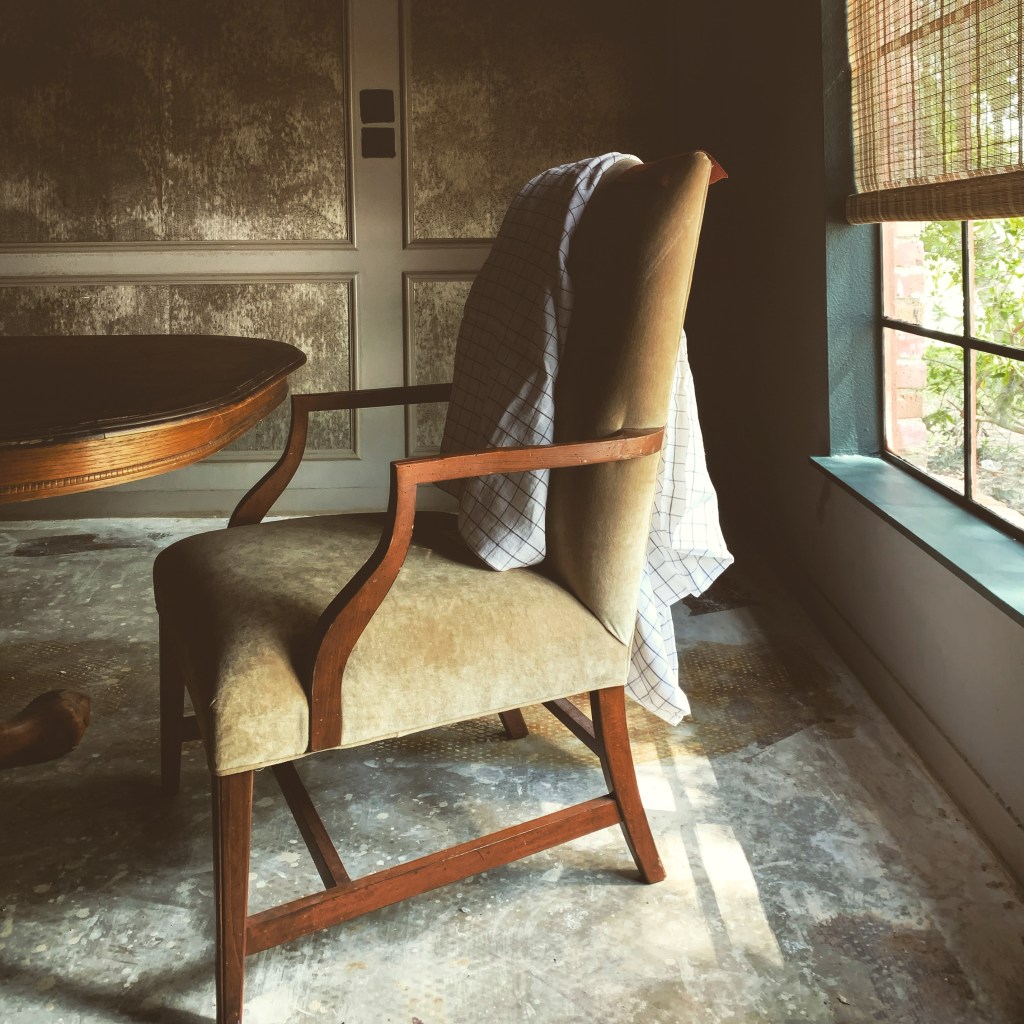
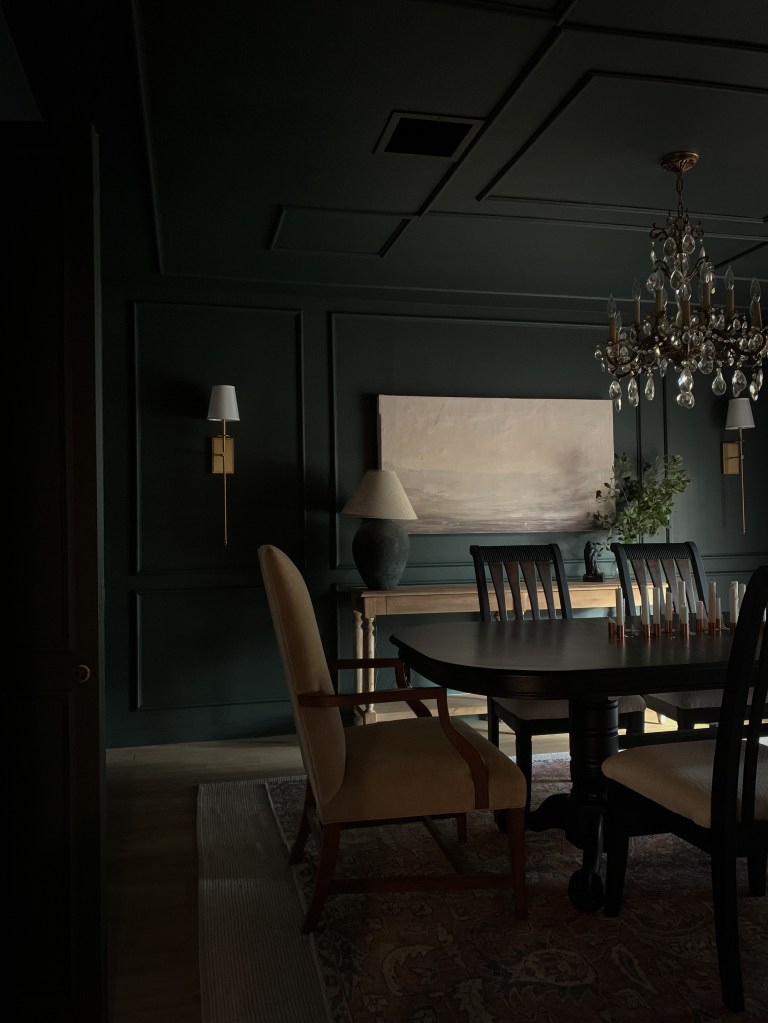
The dining room table and chairs were our existing furniture pieces that we refinished as a part of this project. The table was a $130 facebook marketplace find from about a year ago, and the chairs have been with me since I first graduated from college. They were basically covered in paint and dirty from years of use as step ladders for many of my previous projects. Originally, my plan was to go with a lighter/ bleached look table top and a darker base, and the chairs would be painted black with light/unfinished back fins, but once I got the table top sanded and one of the chairs refinished and back in the room, I knew I had to take a step back and re-think that direction.

It’s okay to be wrong the first time! And this just goes to show that even as designers we may not always have all the answers! Taking the time to constantly evaluate your process and critique yourself, and changing course if necessary, are essential elements to success. In this case, going with a dark onyx finish for the table top and staining the chair fins back to a darker color was definitely the right pivot to make!

The dark and moody feel I was going for in the space is only enhanced by the tone-on tone dark finish of the table top and chairs. While I do think a lighter table top would have “popped” in the space, ultimately, I think it would have detracted from the overall emotive feeling that I was trying to create.

Sconces | Console Table | Glass Vase | Bamboo Shades |Curtain Track | Curtain Ring | Curtains | Shelves |Top Rug | Bottom Rug
*Links are Affiliate Links which I may earn commission from*

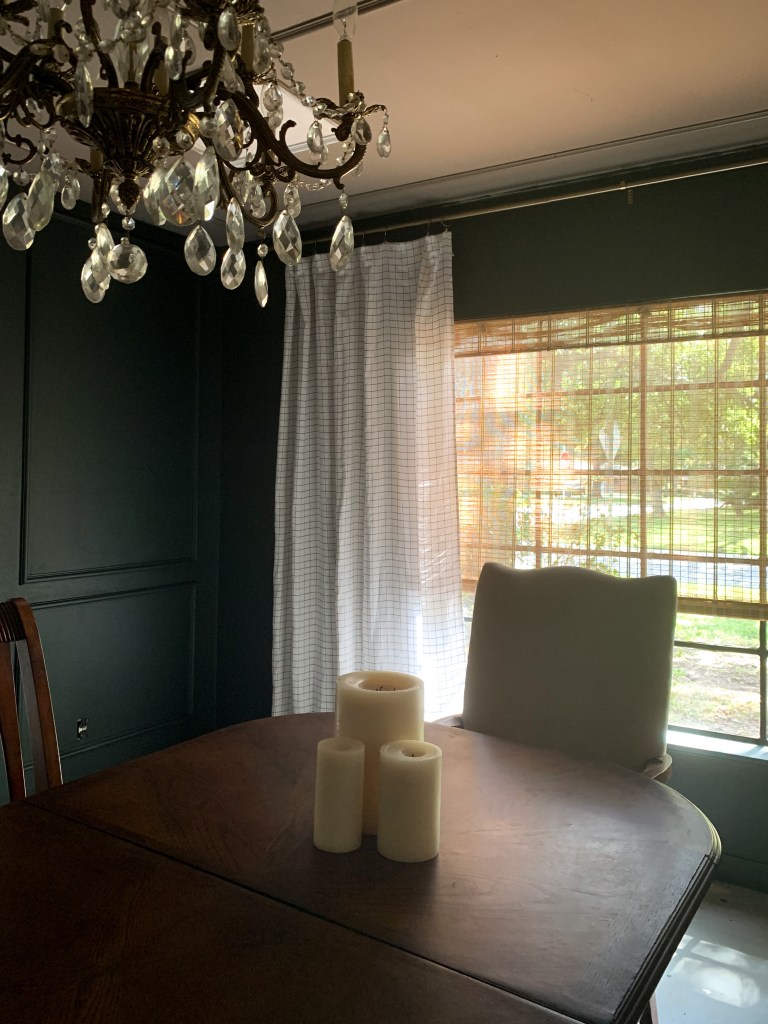
Lighting is key to creating a dark and moody space, and that includes candle lighting! I knew from the beginning that I needed candle sticks, lots and lots of candle sticks! But it wasn’t really in the budget for me to buy all of the candlestick holders we would need. Ultimately I landed on “hack” using a 95 cent plumbing coupling that perfectly fits the candlestick and holds it upright. I also love how the warm metal looks in contrast against the dark onyx table top, and the sparkle as it reflects the light from the candles.

Sconces | Console Table | Glass Vase
*Links are Affiliate Links which I may earn commission from*

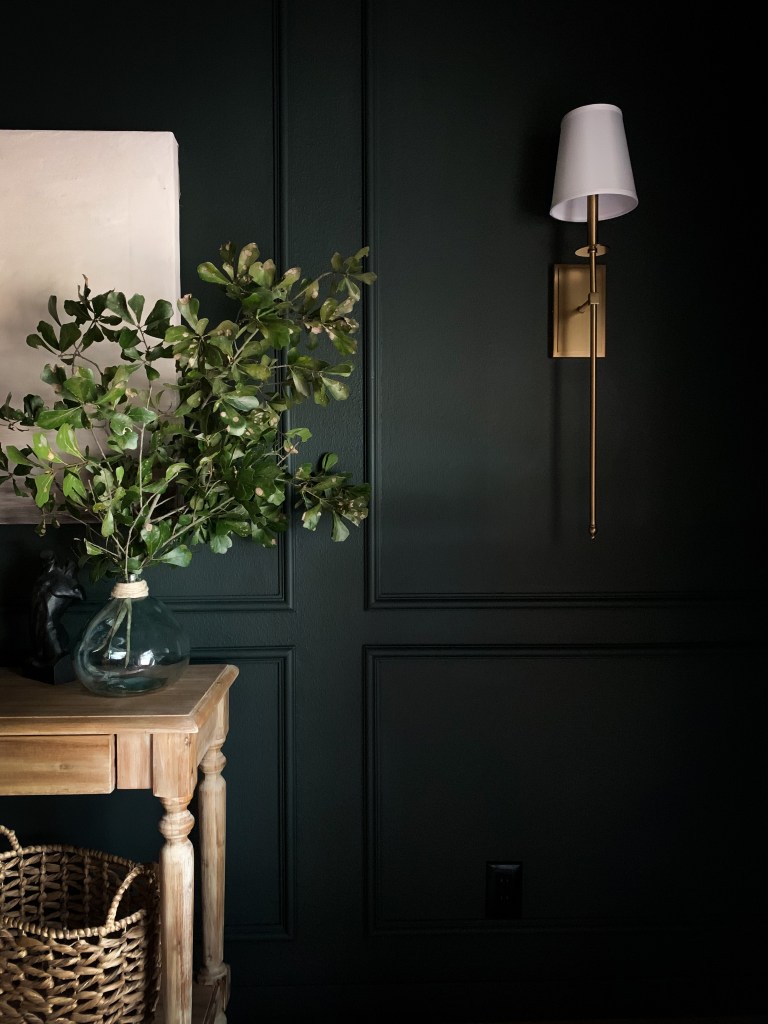
In addition to candle lighting, I also added two sconces centered on the panels at either end of the long wall. Since hard wiring was out of the question, I added two battery operated LED lights and stuck them up inside the shade. They give off a very pretty, warm glow when lit, and add to the ambiance of the space.

I also included my DIY lamp on the console table that I created from a piece of vintage pottery that I found on Facebook Marketplace, and a Himalayan salt lamp on the opposite side of the room to create a balanced lighting environment. While the chandelier overhead provides the most light in the room, the ambiance is best experienced with this one off.

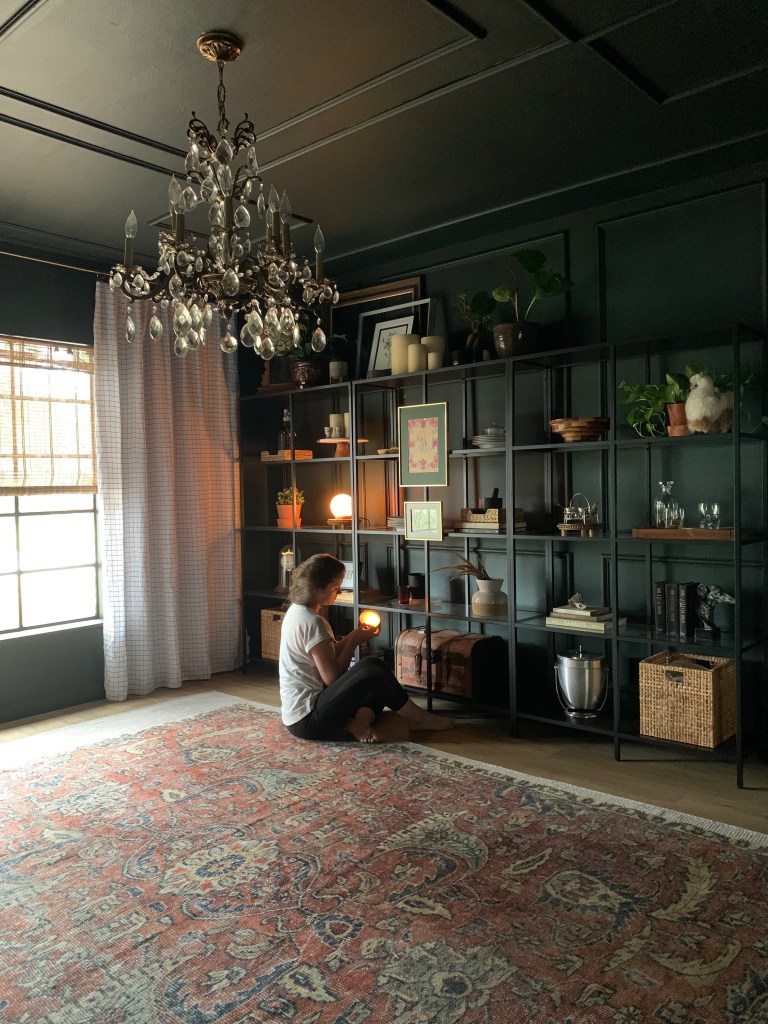
I truly had fun styling these shelves this weekend! I mostly used items that we already had from around the house, but did make a quick shopping trip to Marshall’s to fill in some of the gaps. Originally I had planned to get several more of those Ikea baskets to fill out the bottom shelf and provide some storage for the extra pieces of the China set, but of course at last minute they were out of stock, so I went foraging in my attic and around my house to find items to make this bottom shelf make sense.

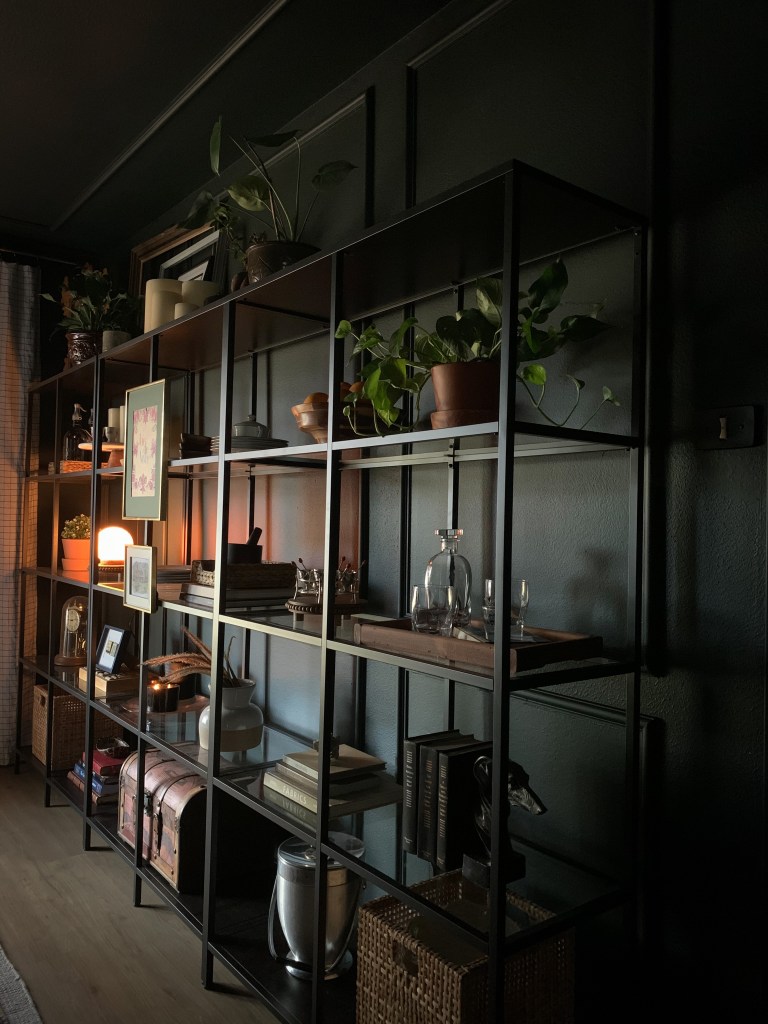
These Vittsjo shelves from Ikea were so affordable and a must have for this space. There was a good duration of time where they were out of stock at the Houston store, and I almost considered driving to San Antonio to get them and here’s why: I could NOT find any other shelves that were so clean line and minimal at this price point- I looked for HOURS. Everything was either too decorative, farmhousey, or like $500 each…YIKES. I didn’t want to take away from the molding that it sits in front of or the other decorative features of the room, so these shelves were the perfect fit. I love the smoked glass, and that there is just enough height at the top to add some larger plants and items that were honestly sitting in the back of my closet .

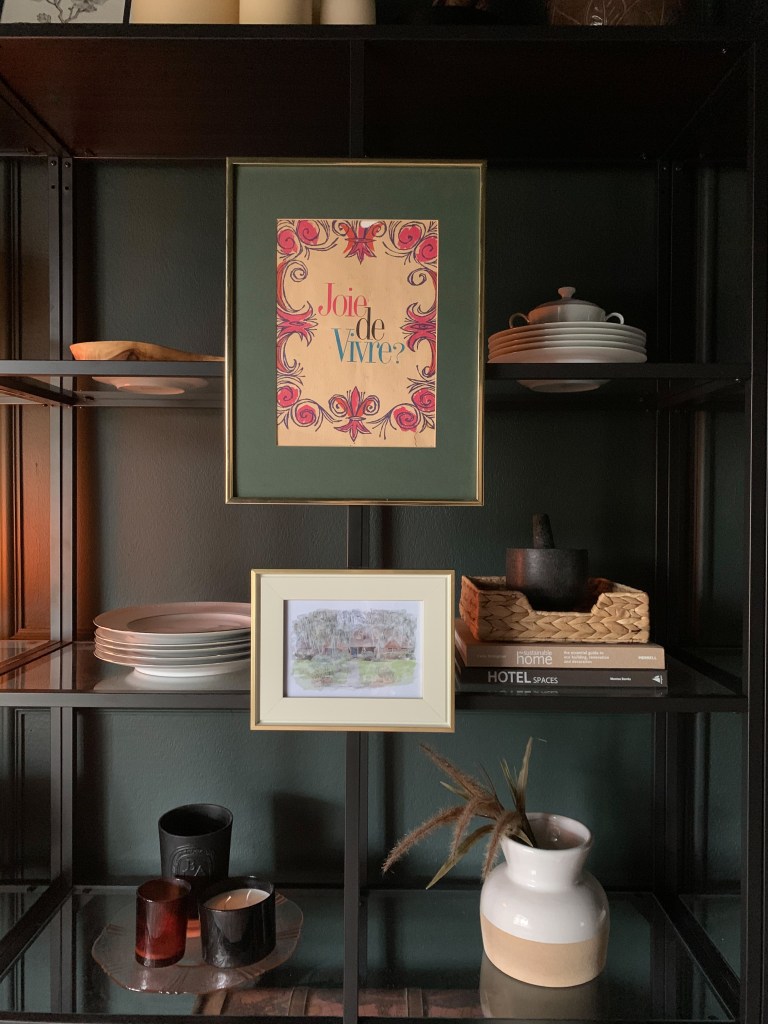
One of my favorite things about the room is the price of the artwork. All FREE! I used frames that we already had around the house (except for the one $4 frame I bought) and framed up some special & found items from around the house. One of them being this vintage Joie de Vivre vacation pamphlet that we found in the back of our bar area when we moved in. Anyone else might have called it trash and thrown it out, but it has just been hanging around waiting for it’s moment to shine! Below is a beautiful watercolor rendition of the outside of our home sent by a friend as a housewarming gift.

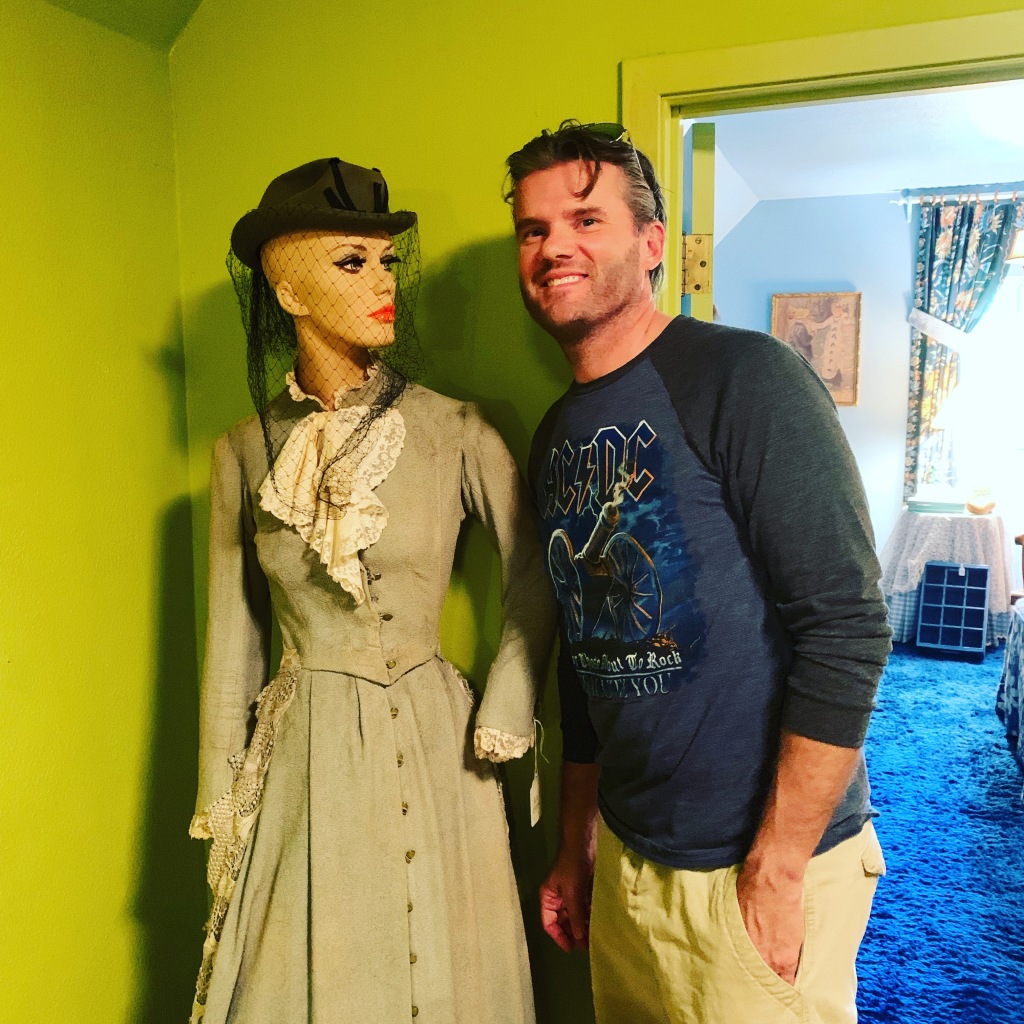
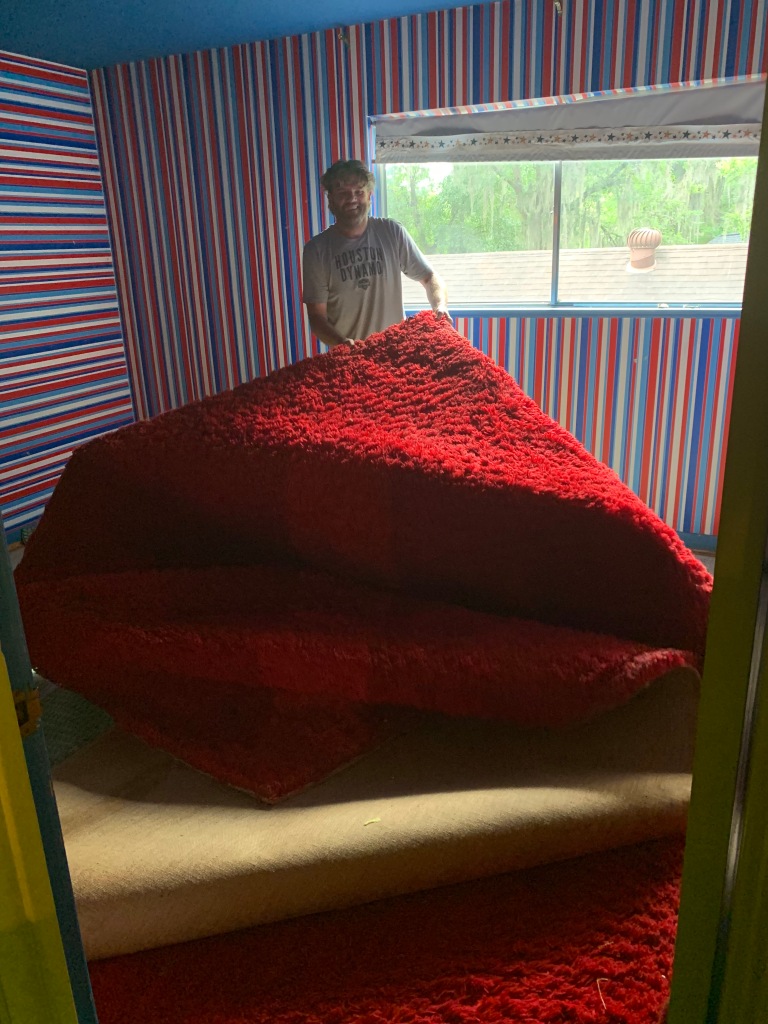
Up on top is a beautiful original that I bought from my cousin (okay, I did pay for that one…) and robbed from my foyer & below the salt lamp is my little Shamrock Hotel memorabilia matchbooks. We found a bunch of these when we pulled up the blue shag carpet upstairs. At the time we didn’t know what the Shamrock was, until people started telling us how cool it was that we found them! Just a little piece of Houston history right in our dining room!

So now the big juicy secret that everyone wants to know…. how much did you spend on this space? At the beginning of this project I sat down and put a budget together and included everything I thought I would need to get this space completed. Some items I already knew what the cost would be, and others I just put a number to (always overestimate!) Honestly, a whole lot went into this space more than a bucket or two of paint, but I’m happy to report that we did come in under my original budget after scoring a steal on the $40 chairs and cutting a DIY buffet project I had planned (Would I have had time for it anyways?)

Budget Breakdown

BudgetSpent
Paint & Supplies150136
Air Vent3020
Curtain Rod & Hooks3555
Curtains176190
Stain & Paint Supplies for Furniture80111
Sconces200172
Shelving240260
End chairs27040
Flooring420420
Upholstery Fabric for Chairs3560
Sideboard750339
Decor150200
Misc Supplies5082
$2,586$2,085

I honestly couldn’t tell you if this is an amazing budget or not…I have no idea what other people spend on their dining rooms, but we definitely didn’t have a whole lot of money to play around with! I’m pretty happy I was able to stay below it, even though I ended up overspending in some areas- and on a bunch of things my budget didn’t include tax or shipping so I ended up spending slightly more (oops!) but I do learn a whole lot every time I do a budget for a space and then finish a project- it definitely helps you learn what to expect for the next go-round! For instance, I wasn’t anticipating this space to take 3 full gallons of premium paint! so now that I know that I’ll be able to save some money on the front room project and just go for the 5 gallon bucket!

Last but not least, please go check out some of the other amazing spaces designers are finishing up and revealing over the next couple of weeks on the One Room Challenge Blog! I have had so much fun getting to know some of these other ladies through the process & have made some true friends! I’m so grateful to be a part of this welcoming, supportive community!

Click on this logo to go to the ORC Week 6 Reveal Link Up!

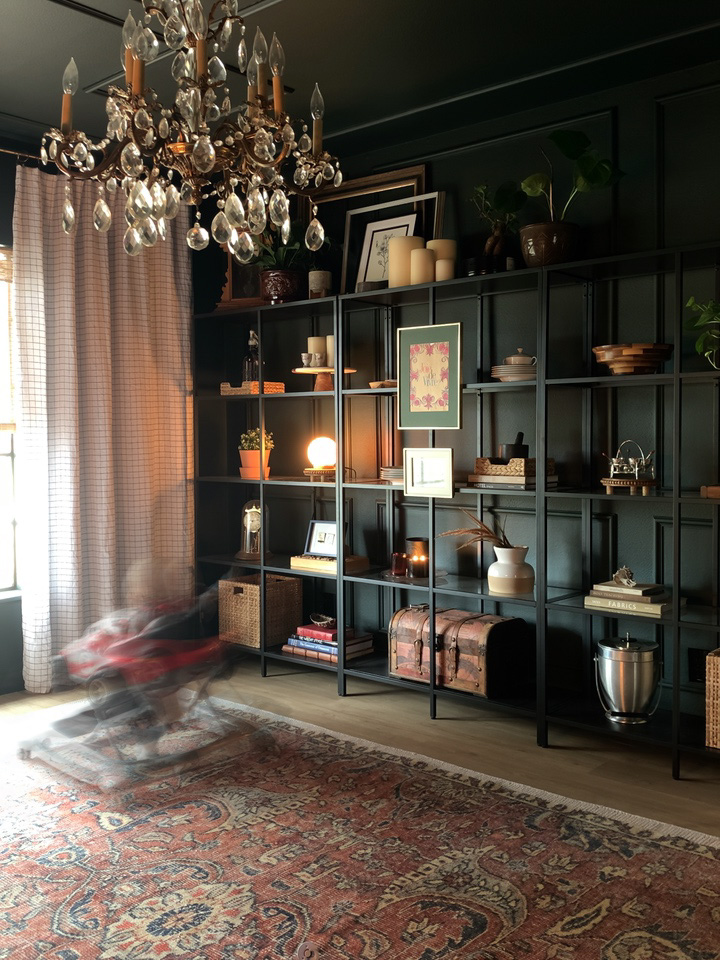
Of course, I don’t want to forget to thank my Mom, who was a huge part of my success in this project, finishing all the tough cuts on the flooring, and doing a lot of painting and wallpaper stripping with me, and of course my super duper mommy’s helper who is racing to those linen curtains in his little red convertible!

Let me know what you think of our finished dining room in the comments! And again, Thank you so much for supporting and following our blog! If you’d like to see what we’re up to next, don’t forget to subscribe & follow our instagram @crazy_stripe_house for daily updates!

The Dining Room Makeover | ORC Week 4

The Dining Room Makeover | ORC Week 4

I’m super late in writing my post this week, because when you have a 7 month old going on 2 year old, life can be unexpected sometimes, and this week he was very anti-sleep so my energy levels have been dwindling… especially with how hard we pushed last week to get the dining room looking so beautiful!

So on Sunday night after I put most of the flooring down and assembled 1 out of 3 shelving units I decided that I was done for the weekend and put everything back together so that we could enjoy our progress as an actual room this week and not a “construction zone” like most of our house is these days. It was so lovely! My mom and I sat in there after dinner just enjoying the space and how it felt so safe and comforting. Lights off with just the sconces and a big candle lit truly makes that chandelier glow like I’ve never seen it, and it made me feel guilty for ever even considering selling it (sorry chandelier!)

So if you remember at the end of last week I had painted just one wall and one corner and hung up the curtains to get myself excited and motivated, and it worked!

This past weekend

  • we finished painting (mostly- we still have the doors & some touch up paint areas)
  • hung up the sconces
  • assembled the console table (originally I had planned to do a beautiful DIY credenza, but it ended up not being in the budget this time)
  • installed the new flooring which arrived like SO FAST! I was so excited!
  • went to Ikea to pick up the shelving I have been wanting and has been out of stock for months but finally back!!!
    • So, I was being super picky about this and I refused to get any other shelving because I wanted something super simple and almost invisible here. I like that it’s black and smoked glass and no frills! I like the open back so you can still see the paneling behind it. I didn’t want to take away from the focus of some other the other super decorative items in the room & honestly you just can’t beat the price of these! (really… I looked)

I just happened to snap this beautiful picture on Saturday night right after we finished painting and cleaning up for the night & it really caught me off guard how stunning it looked! I think I may need to keep the drop cloth around as a table cloth (haha!) Totally kidding….

The end of a long day of painting!

I’m pretty delighted with how good our new flooring is looking after getting most of the straight pieces installed on Sunday! We’re planning to install this in the dining room, the front living room (currently my table makeover workshop) and the kitchen and pantry/laundry room area. It will sure be nice not to have dirty, bare concrete everywhere in our home, so I’m actually itching to move on to getting that installed in the other spaces too!

Flooring install in progress!

Even though we accomplished so much last weekend, this weekend has been SLOW going so far, and I’m feeling this deadline closing in on us very very fast with still having to not only finish, but also figure out what I’m even doing with our existing furniture refresh & the touch up paint, finishing touches, all of that stuff that comes along with finishing a space to the 100% complete point.

For now it’s feeling so good to be 90% there!

Don’t forget to check out my fellow challengers & their progress on their own rooms each week. Click the logo below to go to the link up!

The Dining Room Makeover | ORC Week 3

Well, well, well…week 3 really flew by between working on the dining room, actually doing work (that I get paid for), and spending some good fall family time on Sunday! I’m so happy we were able to take the day off from working and renovating to take Grayson to a pumpkin patch, with him being 7 months old, it was truly a one time experience, and he had a blast!

It feels like we got a whole lot done, but not enough…never enough. To recap from where we left off last week:

Our progress shot from last week with the wallpaper still intact.

The plan was to :

  • Skim coat over all the wallpaper... well- that definitely didn’t happen. I started the first panel and realized that some of the damaged paper (from the foundation cracking) was bubbling up with the wetness of the joint compound, and that’s when I thought “maybe it WOULD take me less time to just strip the paper” I definitely am one to prefer removal if possible, but I had it in my head for so long that I would have to skim this because it was stuck on there so well (and BOY was it!) So we stripped and stripped and my Magic Pro Garment steamer saved the day, because it was just about the ONLY thing that would get that metallic film off the surface!
Click the photo above to shop!
(this is an affiliate link)
  • Drywall Prep – I did SOME…not all of this. I repaired some cracks, and I still have to fix some nail pops and other minor things before I finish painting everything.
  • Paint- To be completely honest, I started painting one wall and the corner (yes, before I finished prepping, shame on me!) but I was really excited to see some change in this space, and sometimes the most motivating thing you can do for yourself is to transform just one thing to keep you excited and moving along in the process. I tend to work in a very non-linear fashion (I even grocery shop this way and it drives Matthew nuts!) So painting one wall, and then going back and fixing some nail pops, and then turning around and starting something else is all a very normal part of my disorganized process
  • Hang the new curtains & rod- CHECK! Woo hooo! Although, since we aren’t done painting, it’s coming back down. I just really wanted to see what it looked like!

Can I tell you a secret about my curtains? …They’re not curtains….They’re twin flat sheets from Magic Linen. They just had a beautiful, large scale windowpane pattern that I was looking for, they were 100% linen and basically the perfect size for an 8 foot tall room curtain. Most curtains you find at a big box store for instance are shorter- I always want near full height curtains to make the window area look larger- These were the perfect fit & I absolutely LOVE them! The linen has a way of looking very casual but also formal at the same time.

Click this photo to shop
(this is NOT an affiliate link, I’m just a nice person who shares things)

So I didn’t get everything done that I wanted this week, but the progress we have made has inspired me to keep on going! If you haven’t already guessed which paint color we went with (We were choosing between Jasper, and Green Black) we went with….

Jasper by Sherwin Williams HGTV Home Color Collection

It’s such a handsome color, the photos really don’t do a great job of capturing it’s depth! (And I’m not a professional photographer by any means, so capturing a darker room is definitely going to be a challenge for me when it comes to the final reveal!)

My little corner of green with my beautiful new curtain hung! (Ceiling not yet painted!) This is progress!

So what is on the Agenda for week 4?

This week I’d like to:

  • Finish drywall prep
  • Finish painting
  • Hang our wall sconces (yes there are wall scones!)
  • Assemble the console table
  • Hang my painting back up
  • Figure out what the heck I’m going to do with the furniture (more answers on that coming next week….I think?)

That’s all for this week my friends! Don’t forget to check out some of my friends over on the ORC link up. I’ll be sharing a few each week on Sunday Shares on instagram too!

The Dining Room Makeover | ORC Week 2

I’ll make this short and sweet as I sit in my breakfast room filled with chairs cleared out of the dining room, the distant clamor of men working in the tunnels below my slab. (finally installing our new plumbing system!) (Y-A-Y!)

This week was all about putting things back together, but also tearing things apart. Wait, What?

When we started this challenge last week, our house was torn apart and in complete disarray from our ongoing foundation project. We had 2 holes in the slab in our dining room space that have now been patched up so we can finally begin to make a little progress. Over this past week, we have very much been trying to put our house “back together” behind the scenes, but we also had a lot of demo and prep work to do for our One Room Challenge Dining Room Makeover.

This is where we started last week with two holes in our slab from foundation work being done on the house

Looking at our “progress photo” from this week may seem like we haven’t done anything yet, but trust me, several late night sweat sessions went into creating that “nothing”

One of our beautiful new chairs for either end of the dining table. You can see the Jasper green paint around the window & a sneak peek at one of our new curtains from @magiclinen

This Past Week Update

To sum up this week in a quick bulleted list (because the internet loves lists, right?)

  • I Cut up and removed the carpet and pad
  • I Scraped the glued pad off the floor
  • I Pried the tack strip out of the concrete (my least favorite thing to do)
  • I Swept/ Shop vacuumed the slab
  • I Painted the slab by accidentally spilling a 5 gallon bucket of paint onto it, which turned into a huge mess
  • I Cleaned the window & painted the mullions black
  • I Caulked around the window & painted Jasper Green from @sherwinwilliams HGTV home collection to try to decide on the color of the room. Thanks for everyone who weighed in on Insta Stories! I was deciding between Jasper and Green Black. It was HARD.
  • I Removed the old curtain track from the ceiling
  • I Went to pick up 2 extra chairs I scored from Facebook Marketplace for $40, I didn’t think we could afford to get extra chairs right now, In fact I had to cut A LOT of things I wanted to do from this project to make it work for our budget right now, so this was a super exciting “win” for me. Also they are VERY comfortable – I told my mom I now need one of those fancy “egg cups” that people put their hard boiled eggs in for breakfast (this might make no sense unless you are inside my brain, but fancy dining rooms call for fancy egg cups, and these $40 chairs feel FANCY) (yikes to that statement….)
Here’s what I did this week (video version)

Week 3 To Do List

I’m not sure if this list is more for me or for you, but here is what we would like to get done in the dining room this coming week:

  • Skim coat over all of the wallpaper (sorry…bye wallpaper)
  • Drywall Prep (minimally) Most people will do all this before they paint, but we’re actually doing this a bit backwards. because our foundation was just lifted, they said it would take another 90 days or so and we would see some settling and movement, so they recommended not spending time or money repairing drywall cracks. We’re just going to clean them up a little bit for now, paint it, and then come back later and do a full repair a few months from now.
  • Paint the walls, ceiling, baseboards, doors (which color green did I pick!?)
  • Hang the new curtain rod & curtains

That is a whole lot of work right there! This room is going to transform in a major way this week & I am here for it!

Also don’t forget to check out all the other One Room Challenge participants and view their progress this week~!

See you next week my friends!

The Dining Room Makeover | ORC Week 1

So if you’ve been following along with our house drama this week over on instagram, you’re going to think what I’m about to tell you is pretty crazy, and me, crazy by association… But even with all of the chaos surrounding us with the major foundation repair, the honey bees, and the animal attack on our roof, I’ve been pretty excited to tackle the dining room for a while now and decided to participate for the first time in the One Room Challenge as a guest participant!

If you don’t know what the One Room Challenge is, it’s a virtual “event” that takes place twice a year in the spring and fall where professional designers and amateur DIYers alike challenge themselves to complete a room in their home. You can read more about it on their website here. The event is not a competition, but more of a supportive group & as a new blog we’re excited to start connecting with the other participants and rooting them on with their own spaces.

Now about this dining room, let’s take a trip down memory lane, shall we? Here is the dining room when we first looked at the house. It was actually quite a tastefully decorated room, very formal and traditional style, and although the metallic wallpaper is not my particular taste, many people have told me that they love it! The curtains were fabulous custom draperies, printed silk- we took them down and stored them because…dogs…cats…babies…clumsy adults.

Photo Credit: TK Images

I am so excited to finally be able to put my own touch on this dining room and make it a lovely and inviting space for my family to gather at dinner time. I know that many people say they don’t ever use their formal dining room except for during the holidays, but my family uses this space every night for dinner, and this is a wonderful habit of family time that I would like to instill in my son as he grows up.

I have actually been planning what I want to do with this space for quite a while, but let me just share with you the current state of things over here at the Crazy Stripe House, as this is one of the rooms heavily impacted by our ongoing foundation work.

Our Dining Room on Monday of this week.

As you can see, the carpet has been pulled up and is not going back. Under those two pieces of plywood are massive holes in the slab where pilings are being pressed into the earth about 22-25 feet deep, all before they level out our whole house in the coming week. So honestly, we’re going to be a week short on this project, because we need to hold off on starting this until they get those holes filled in!

But don’t worry! what we have planned is simple, budget friendly (it needs to be honestly…) and very impactful! On the agenda for this project is:

  • painting the room
  • installing new flooring
  • refinishing the table and chairs
  • and adding some furniture & accessories to complete the space

I’ll be posting once a week to update you on our progress with the challenge & also be sharing live on Instagram stories!

Last but not least, I made a “mood board” to give you an idea about how I want the space to feel. It’s not completely literal- some of the images are emotive and some are of actual items/finishes being used in the space.

The concept is a very dark and cozy space. The room does not get a lot of the bright light we see in other rooms in the house due to the South facing window, so combined with that, and the beautiful trim work on the walls and ceiling that we are already blessed with, I feel that it’s calling out to be a color other than white.

I can’t wait for you to all follow along as we get started putting our house back together & finally making it a home!

Cheers to week one!

The “Crazy Stripe House”

A little over a year ago we completely lost our sanity and bought this massive, crazy old house. It was just the two of us then, along with our two dogs and our wild-spirited cat. Although we have been sharing our stories on Instagram for quite a while now, it has been long overdue for us to start sharing a bit more about our “adventures” in owning this historic, and often frustrating beauty.

Here is the listing photo from the corner of our house Photo Credit: TK images

As a quick refresh for those who have already been following along, and an introduction for those who are new here- Our home is a mid-century modern “tudor revival” style home. It has 6…technically 7 (if you count the study we turned into Grayson’s room) bedrooms, 4 bathrooms, and just over 4200 square feet including a separate apartment/suite in the back off the garage. It was built in 1956, and it was one of the first custom-built homes in our iconic mid-century neighborhood, and definitely the first built on our street! We lovingly call her the “crazy stripe house” for our somewhat famous room upstairs “the stripe room”… which I can honestly tell you, the photos just don’t do it justice.

This is me experiencing the stripe room for the very first time in person.

We are the 3rd owners of this old lady and the owners before us had the house for  almost its entire life. (the original owners, and we assume builders of the home only lived here for a few short years.)

Truth be told… and almost nobody knows this… I had her in my sights well over a year before we bought her, and before I even considered selling my first home in Savannah, GA- certainly well before we were officially “house hunting”. I tried (and succeeded) in talking myself out of buying it many times. It was too big for us, too much work, the kitchen was just too small (it is…I hate it…more on that later…) I actually didn’t even ask our realtor to show it to us… He just happened to recommend we go see it since we were looking at other homes in the neighborhood that day.

If I’m being honest, I had looked at the photos and the 3D house tour so many times I knew exactly what I was going to be seeing, and I even had planned out renovations in my head (it’s not weird if you’re a designer…I do this a lot). But something happened on that home tour that I wasn’t quite expecting. Despite all the clutter, and the crazy wallpaper, and the cherubs holding giant seashells, and all the shag carpet and green and salmon paint, and the creepy (like SO creepy) mannequin in the corner of the upstairs room (we named her Wilmerdean, one of our neighbors ultimately bought her at the estate sale and stuck her in their front window naked for several weeks…)

Matthew posing with Wilmerdean – a true love story.

Where was I before I trailed off describing how insane this house was? Oh yeah…something happened on that house tour… I really fell in love with this house in an unexpected way- the thoughtful layout, the graciousness of the space, it’s truly something you can’t really experience without physically walking through. There was a very intentional and thoughtful quality of materials despite some crazy wallpaper choices. This house was so charming, and in many ways like a hidden treasure that nobody else could see.

The breakfast room from the listing photo- even though I hate the kitchen
area and think it’s way too small, this part of the space has always charmed me, and still does.. Photo Credit: TK Images

Even though we saw several other houses that made sense for us- and even put an offer in on another house first- I couldn’t quite get this one out of my head. I even started crunching budget numbers for potential priority renovations to see if it even made sense considering all the work that needed to be done. Even though the value has increased pretty significantly since we bought it, we still kinda took a gamble on it, expecting the neighborhood to bring the value up over the next 5-10 years.

As for our journey so far with this house over the past year and handful of months we have:

  • Renovated the master suite including closets & hallway
  • Renovated our study into a nursery for Grayson
  • Painted the foyer & up the stairwell
  • Did a sunroom refresh
  • Did a front porch “clean up”
  • Had some big trees removed that were too close to the house
  • Gutted the half bath down to studs (still waiting to finish this one…more on that later)
  • Renovated the back apartment for my mom (phase 1 cleanup)
  • Did a full studs-out reno of the back apartment bathroom

Now that I’ve listed that out, it does feel like a lot for just being here a little over a year, and being pregnant for 9 of those months no less, but sometimes it still feels so slow and I wish I could actually work at the speed of those super fast time lapse videos!

Of course let’s not forget what I caught Matthew doing literally
5 minutes after we entered the house the day we closed on it.

I would definitely like to revisit some of these projects in greater detail on the blog, but don’t worry- this house has like 100 billion projects to go & there is so much to share!

Thanks for following along and supporting our recovery from insanity! ❤